
Spark Installation on Windows
Intro
Today I will discuss how to install Apache Spark onto a Windows machine. I have just walked through the process a second time at work due to a laptop swap and it takes me some time to remember all the steps to get the install right, so I thought I would document the process.
Step #1: Download and Installation
Install Spark
First you will need to download Spark, which comes with the package for SparkR. Note, as of this posting, the SparkR package was removed from CRAN, so you can only get SparkR from the Apache website. Spark can be downloaded directly from Apache here. I downloaded Spark 2.3.0 Pre-built for Apache Hadoop 2.7 and later.
After downloading, save the zipped file to a directory of choice, and then unzip the file. I have an Apps (“C:\Apps”) folder where I put all the software that I download and install. This make it easy to transition to another laptop as all I have to do is go down the list installing software. I changed/shortened the Spark folder name for simplicity and ease of typing.

Install Java
As of this writing, Java 9 (I haven’t test Java 10) has been having a ton of issues and is not stable. I was able to use the most recent version of Java 8. You can download the most recent version for Windows at this link. You have to accept their license agreement before downloading.
Unlike Spark, I will let the system determine where to install Java. I feel like this works best to reduce future issues. When you install Java, pay attention to the folder location of the installation. You will need to know this path to create the JAVA_HOME environmental variable.
Install WINUTILS
This step tripped me up for a long time when I first started learning about Spark. Not many blog posts would talk about installing this software. I am not really sure what it does, but if you want more information here is the ApacheWiki. You can download the winutils software from the github repo here. Click on the green button (“clone or download”) on the upper right of the page and download the zip file. I would put this in your “C:Apps\winutils” folder so you can reference it easily (you will need it later). Extract all the files to this location using decompression software like PeaZip or WinZip. PeaZip is free and open source.
Once you have unzipped the file it should look like this: 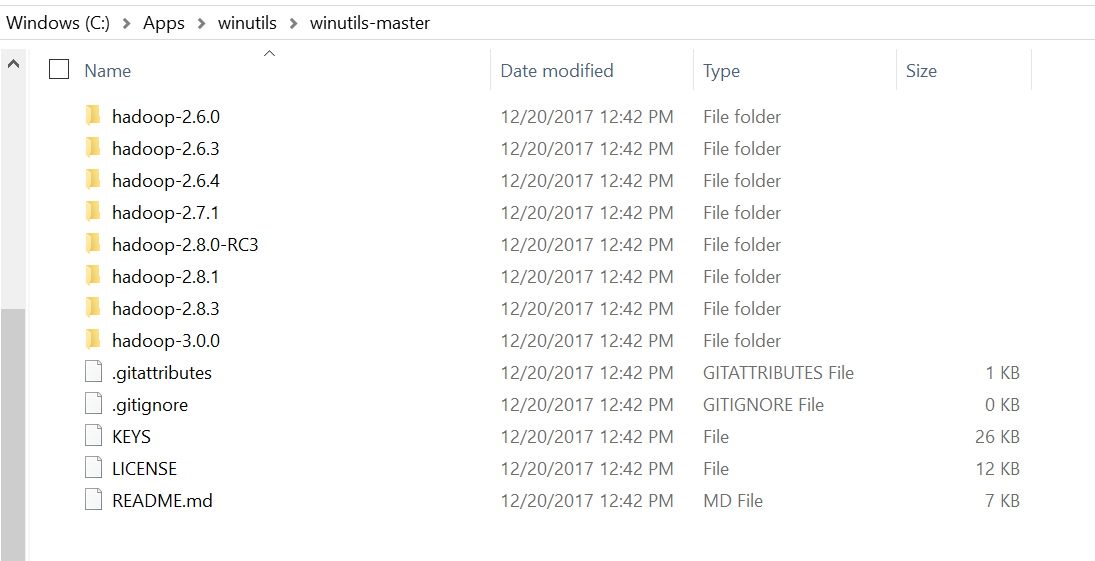
Step #2: Set up system environmental variables to run Spark (either in windows, or R):
NOTE: if you decide to set the environmental variables through R, you need to remember that it does not change them on your machine, nor does it flow through to the next session unless they are establish in your .Renviron script. The code to do it in R is below, however, I will discuss setting up on your machine next.
  Sys.setenv(Variable Name = "Variable Value")
  Sys.setenv(SPARK_HOME = "C:\\Apps\\Apache\\Spark\\spark-2.3.0\\bin")
SPARK_HOME:
The process to set up the environmental variables on your machine will be similar for Spark as it is for the other variables below, where you provide a variable name, variable value and add it to the Path variable. So I will use Spark as a example that you can apply to the other variables.
- Locate the master or top level file path for the Spark version you downloaded to add to your environmental list. For Spark, the path is in my “C:\Apps” folder, or “C:\Apps\Apache\Spark\spark-2.3.0\”, copy the file path using ctrl + c.
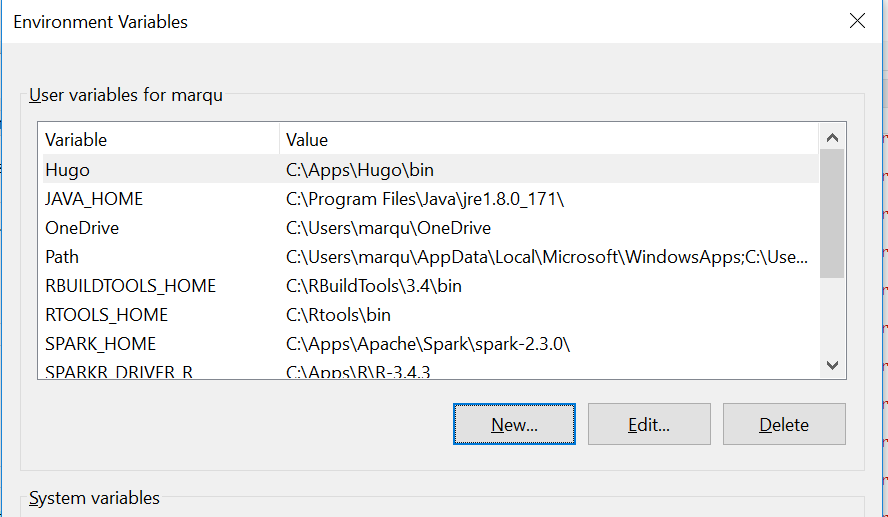
- To locate your environmental variables On Windows 10, you can type “environmental” into the search bar at the bottom of you screen, then click on “edit system variables,” and click on the icon that says environmental variables at the bottom. On previous versions of Windows, click on the start menu, right click on computer or control panel, select properties and click on the icon that says “environmental variables”" at the bottom.
In both cases your system properties should look like this: 
- Next, add a new variable by clicking on the “New” icon in the User variables section.
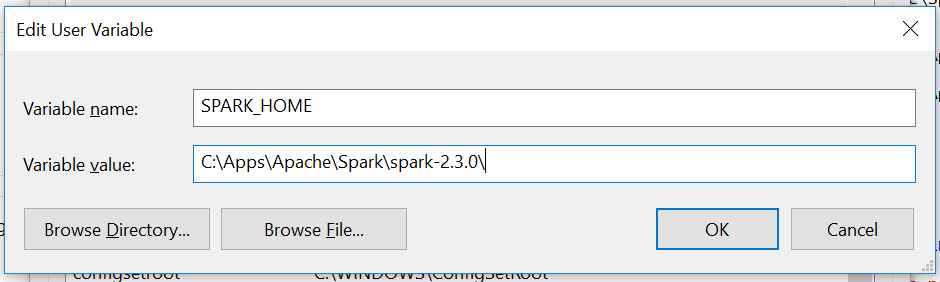
- Fill out the fields as follows:
  Variable Name: SPARK_HOME
  Variable Value: C:\\Apps\\Apache\\Spark\\spark-2.3.0\\ ( or path to your Spark bin folder)
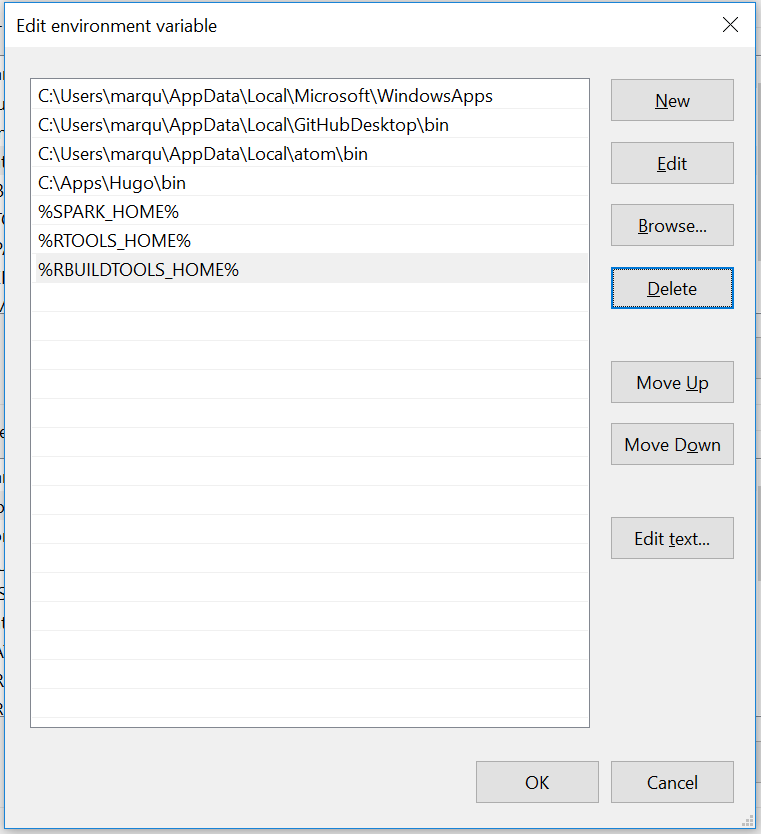
- The next step is to add the new variable to your user Path variable. In the list of variables in the “user variables” section, you are going to see a variable called “Path.” Select this variable and click on the “Edit” icon. On Windows 10, you get a nice looking list of what is included in the path, but in older versions, you get a long string of variables separated by semi-colons. For example, to add the SPARK_HOME environmental variable to an older version of Windows you would add the following to the end of the Path variable:
;%SPARK_HOME%- For Windows 10, once you have clicked on the “Edit” icon to edit the “Path” variable you will see the window below. Click on the “New” icon and add the name of the variable as we did above but without the semi-colon, %SPARK_HOME%, in one of the availabe spaces then click “OK” at the bottom of the window. Your “Path” should now have the SPARK_HOME environmental variable as below:
JAVA_HOME:
Go to the folder where you Java is installed. I installed the 64bit version, so the Java folder is in my C:\Programs directory. If you have installed the JDK version of Java, you will see 2 folders in the Java directory. One for JDK, and the other for JRE. Go into the JRE directory and copy the path, and add it to your system’s environmental variables. NOTE: do not use the path to the “bin” folder as this will cause JVM errors when launching SparkR.
  Variable Name: JAVA_HOME
  Variable Value: C:\Program Files\Java\jre1.8.0_171\
WINUTILS_HOME:
Since I have installed winutils in my C:\Apps directory, I will copy the path from there. I will reference the path of the master folder.
  Variable Name: WINUTILS_HOME
  Variable Value: C:\Apps\winutils\winutils-master\
SPARKR_DRIVER_R: (Optional, maybe needed on a hadoop system)
The SPARKR_DRIVER_R environmental variable I tripped over on my work’s hadoop system when I was looking for something else. I noticed their SPARKR_DRIVER_R was set to their R home directory. You can find your R home directory with the command below in your R console. Note, R may give you a path with a tidla, but if you paste it into a folder browser you can get the full path. Exampe, C://Apps//R//R-34~1.3 means C:\Apps\R\R-3.4.3. As you can see, my R is installed in my C:\Apps folder.
  Sys.getenv() - all environmental variables
  Sys.getenv("R_HOME") - Value for the R_HOME environmental variables.
You know have the information to create your own SPARKR_DRIVER_R environmental variable:
  Variable Name: SPARKR_DRIVER_R
  Variable Value: C:\\Apps\\R\\R-3.4.3
Once you have all your environmental variables your Path variable they should look like this: 
Now that you have everything set up you will have to restart your R and RStudio, meaning close out and open back up, so that they pick up the changes made to the environmental variables.
Testing Installation
First run Sys.getenv() in R or RStudio after restarting to ensure the environmental variables are set as stated above in you R session. If not go back and figure out what you missed.
Load Packages
I am going to load the tidyverse package to drive a point. The Spark package masks many functions in the tidyverse universe, so it matters how you call a function. When using SparkR along side other R packages, I recommend using the double colon to call your functions, at least SparkR functions with common names. For example, instead of sql(), use SparkR::sql().
library(tidyverse)## Warning: package 'tidyverse' was built under R version 3.5.3## -- Attaching packages ----------------------------------- tidyverse 1.2.1 --## v ggplot2 3.1.0 v purrr 0.3.2
## v tibble 2.1.1 v dplyr 0.8.0.1
## v tidyr 0.8.3 v stringr 1.4.0
## v readr 1.3.1 v forcats 0.4.0## Warning: package 'ggplot2' was built under R version 3.5.3## Warning: package 'tibble' was built under R version 3.5.3## Warning: package 'tidyr' was built under R version 3.5.3## Warning: package 'readr' was built under R version 3.5.3## Warning: package 'purrr' was built under R version 3.5.3## Warning: package 'dplyr' was built under R version 3.5.3## Warning: package 'stringr' was built under R version 3.5.3## Warning: package 'forcats' was built under R version 3.5.3## -- Conflicts -------------------------------------- tidyverse_conflicts() --
## x dplyr::filter() masks stats::filter()
## x dplyr::lag() masks stats::lag()Set library path and load SparkR library:
This is one way to load your SparkR packages. Notice all the packages that are masked by SparkR.
.libPaths(c(file.path(Sys.getenv("SPARK_HOME"), "R", "lib"), .libPaths()))
library(SparkR)
##
## Attaching package: 'SparkR'## The following objects are masked from 'package:dplyr':
##
## arrange, between, coalesce, collect, contains, count,
## cume_dist, dense_rank, desc, distinct, explain, expr, filter,
## first, group_by, intersect, lag, last, lead, mutate, n,
## n_distinct, ntile, percent_rank, rename, row_number,
## sample_frac, select, sql, summarize, union## The following objects are masked from 'package:purrr':
##
## negate, when## The following object is masked from 'package:ggplot2':
##
## expr## The following objects are masked from 'package:stats':
##
## cov, filter, lag, na.omit, predict, sd, var, window## The following objects are masked from 'package:base':
##
## as.data.frame, colnames, colnames<-, drop, endsWith,
## intersect, rank, rbind, sample, startsWith, subset, summary,
## transform, unionThis version of code is commonly used in the SparkR documentation.
library(SparkR, lib.loc = c(file.path(Sys.getenv("SPARK_HOME"), "R", "lib")))Use the code that best suites your style of coding, there is no right way.
Create a Spark Session
Now that you have the SparkR package loaded, you can create a spark session on you local machine. There are 4 options below that are mandatory.
- enableHiveSupport - must be set to FALSE if you are running on local with no HIVE, otherwise Spark errors out trying to fine the HIVE warehouse. If you are running this on a Jupyter notebook on a Hadoop system with HIVE, this should be TRUE.
- master - must be set to local “local[*]” or to “local[K]” to be used by Spark. This [*] option uses the maximum cores available on your machine, while K you set the number of cores for Spark to use. On hadoop this will be “YARN” or some other configuration depending on your system build.
- sparkHome - field also took me a long time to figure out. I came across it on some blog a while ago, so I can’t give them credit, but that was a big win. Provide the path to your Spark home directory to this field. This may not have to be done on a Hadoop system.
- spark.sql.warehouse.dir - in the options list was also a big headache. The way I resolved this was trial and error, copy and pasting what other people were doing to see if it would get me past the errors messages.
sparkR.session(
               enableHiveSupport = FALSE ,
               master = "local[*]",
               sparkHome = Sys.getenv("SPARK_HOME") , # this was the missing link!!
               sparkConfig =
                 list(spark.driver.memory = "2g",
                      spark.sql.warehouse.dir="C:\\Apps\\winutils\\winutils-master\\hadoop-2.7.1") # winutils path directory
)
## Spark package found in SPARK_HOME: C:\Apps\Apache\Spark\spark-2.3.0\## Launching java with spark-submit command C:\Apps\Apache\Spark\spark-2.3.0\/bin/spark-submit2.cmd --driver-memory "2g" sparkr-shell C:\Users\marqu\AppData\Local\Temp\Rtmpsn35jq\backend_port9b9c5b445e51## Java ref type org.apache.spark.sql.SparkSession id 1If you get a “Java ref type…” you have a Spark session up and running. All the other settings are optional from what I found, such as the spark.driver.memory because they come with initial defaults. For example, the spark.driver.memory is defaulted to 1g.
Look at your Spark Session Stats:
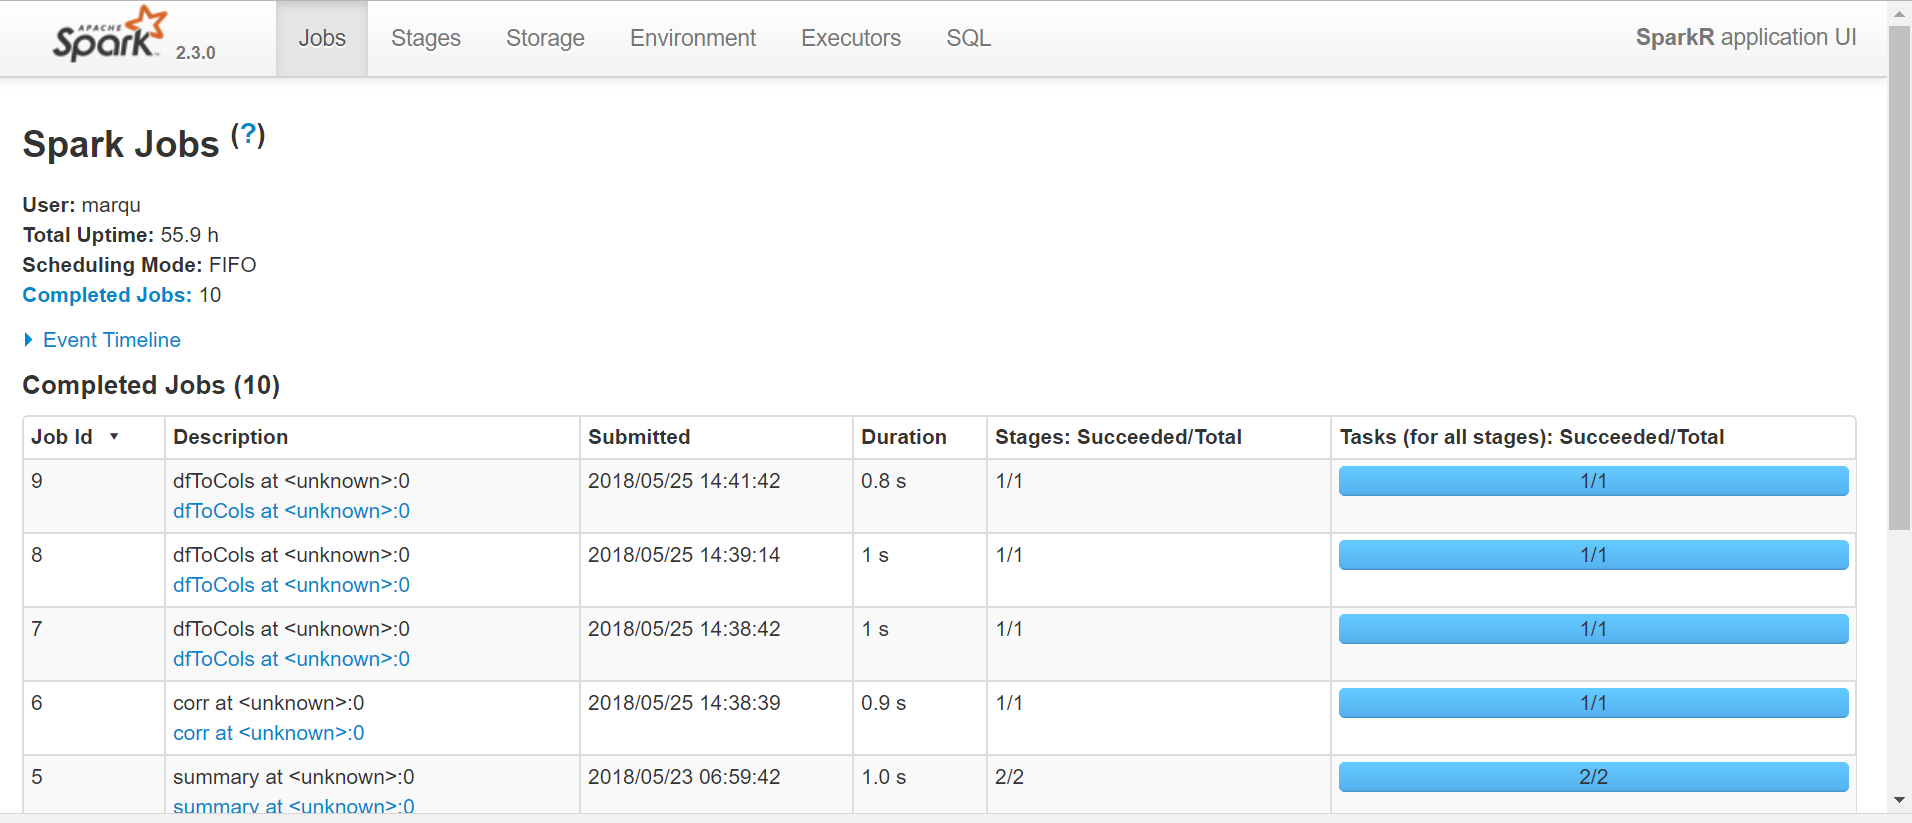
Paste the url provided below in a new browser tab to look at the Spark session running on your machine. You will able to see a history of the Spark jobs you submit on this site.
sparkR.uiWebUrl()## [1] "http://LAPTOP-OK0GO7H8:4040"Sometimes you get an IP address, 172.16.0.200:4040, and sometimes you get a blob such as http://LAPTOP-OK0GO9H7:4040. If you do get a blob, go to your cmd(command line) and type in “ipconfig /all” (source) to get the IP address to your local host. There you will find the IP4v address, add the :4040 or :4041 to end and paste into your browser. In any case, you should see the Spark Application UI (see below).
Load data into Spark
Load the faithful data into Spark. Notice that the data frame type is “SparkDataFrame,” meaning that this data set is distributed and some regular R commands will not be able to handle this object type.
df <- as.DataFrame(faithful)
str(df)
## 'SparkDataFrame': 2 variables:
## $ eruptions: num 3.6 1.8 3.333 2.283 4.533 2.883
## $ waiting : num 79 54 74 62 85 55colnames(df)## [1] "eruptions" "waiting"Create a volatile table in Spark memory so that you can reference the data frame with Spark SQL.
createOrReplaceTempView(df, "df")waiting_70 <- SparkR::sql("select * from df where waiting > 70")
str(waiting_70)## 'SparkDataFrame': 2 variables:
## $ eruptions: num 3.6 3.333 4.533 4.7 3.6 4.35
## $ waiting : num 79 74 85 88 85 85head(SparkR::collect(waiting_70), 10)## eruptions waiting
## 1 3.600 79
## 2 3.333 74
## 3 4.533 85
## 4 4.700 88
## 5 3.600 85
## 6 4.350 85
## 7 3.917 84
## 8 4.200 78
## 9 4.700 83
## 10 4.800 84SparkR::collect(SparkR::summary(df))## summary eruptions waiting
## 1 count 272 272
## 2 mean 3.4877830882352936 70.8970588235294
## 3 stddev 1.1413712511052083 13.594973789999392
## 4 min 1.6 43.0
## 5 25% 2.15 58.0
## 6 50% 4.0 76.0
## 7 75% 4.45 82.0
## 8 max 5.1 96.0SparkR::corr(df, "waiting", "eruptions")## [1] 0.9008112waiting_avg <- SparkR::select(df, SparkR::mean(df$waiting)) %>% SparkR::collect()
eruptions_avg <- SparkR::select(df, SparkR::mean(df$eruptions)) %>% SparkR::collect()
df %>% SparkR::collect() %>%
ggplot(aes(x = waiting, y = eruptions)) +
geom_point() +
geom_smooth() +
geom_vline(xintercept = waiting_avg$`avg(waiting)`) +
geom_hline(yintercept = eruptions_avg$`avg(eruptions)`)## `geom_smooth()` using method = 'loess' and formula 'y ~ x'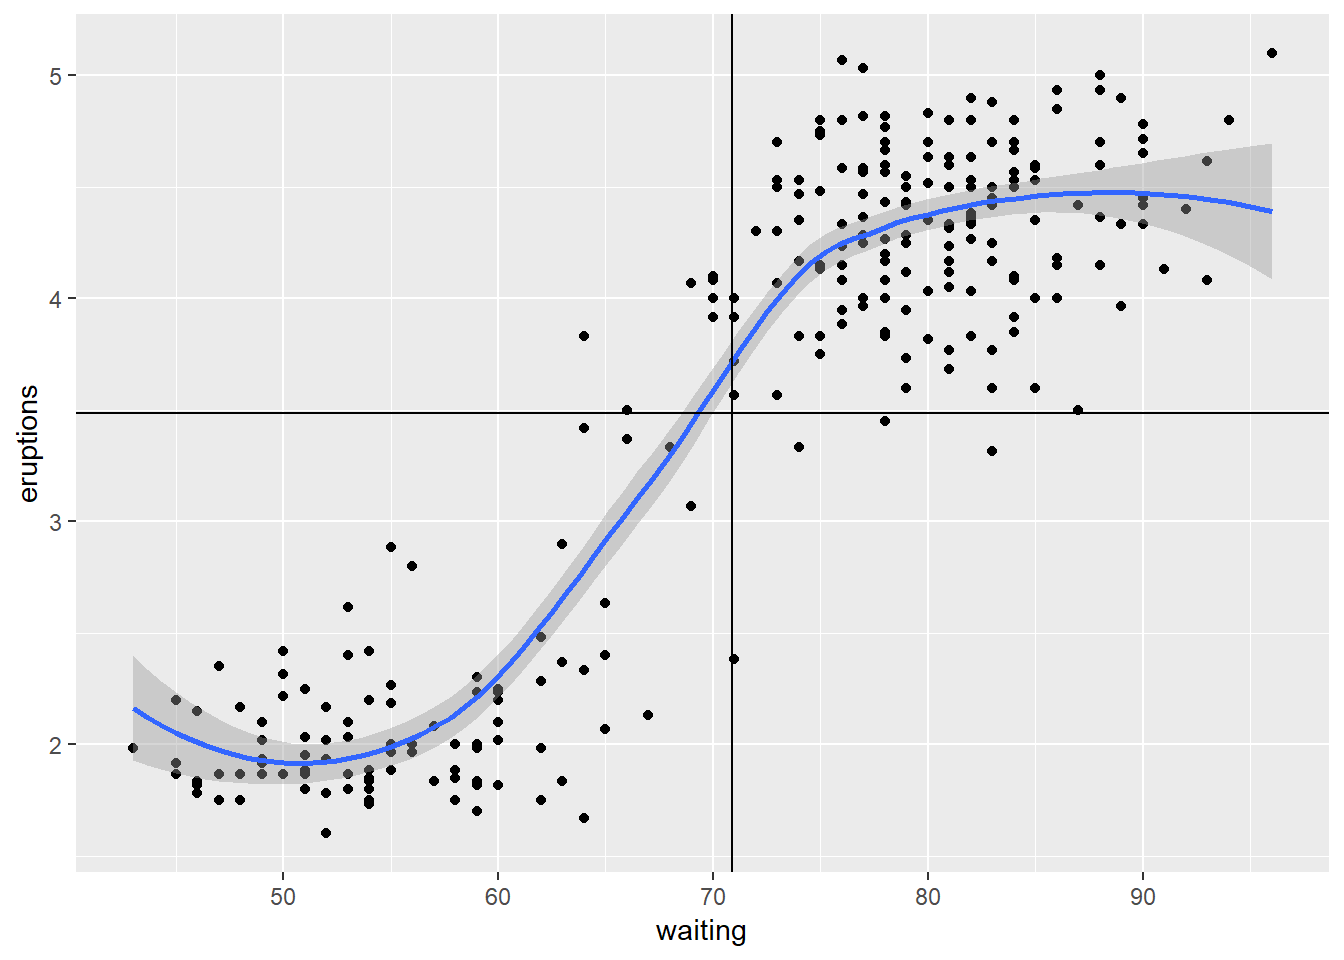 The scatter plot of faithful data shows a clear distinction between 2 clusters, which is not discernable from the correlation of .90. The moral of the story if you have to wait past 1 hour for old faithful to erupt, then there is a good chance you will have to wait an additional 10 to 30 minutes, but you will only gain 2 minutes of eruption time on average.
Conclusion
If you are interested in learning and using Spark, you should be able to do that now on any PC or laptop without the need of an entire Hadoop cluster. This blog covered the minimum software download and installation instructions to get you up and running with Spark and SparkR. Finally, I provided a simple example to show that the SparkR installation is working. If you would like to learn more about Spark and SparkR look up the references below.
References
Spark Docs : https://spark.apache.org/docs/latest/index.html
SparkR Vignette : https://github.com/apache/spark/blob/master/R/pkg/vignettes/sparkr-vignettes.Rmd
RPubs : https://rpubs.com/wendyu/sparkr
- SafariBooksOnline : https://www.safaribooksonline.com/
- ask your employer for access or adoption…awesome resource.
Kuddos for the Spark image goes to:
Apache software foundation - https://spark.apache.org/images/spark-logo.eps, Apache License 2.0, https://commons.wikimedia.org/w/index.php?curid=57832155